Accepting Crypto Payments With Coinremitter: An Ultimate Guide for Merchants

Introduction
Moving a step ahead of TradFi, Coinremitter is a crypto payment gateway, which lets merchants accept crypto payments with ease. The concept of eliminating formalities such as adding identity proofs or bank accounts while signing up has been hailed by merchants globally. However, we believe in spreading awareness about crypto payments. Below you will get to see a brief guide to accepting crypto payments.
There are several steps to be followed before a merchant begins accepting crypto payments:
1. Sign up/log in
2. Add a compatible crypto wallet
3. Add the option of crypto payments to your website
4. Test your integration
1. Sign up/log in
Individuals who are new to Coinremitter need to sign up. Rest can continue logging in. The best thing about this crypto payment gateway is merchants can sign up without adding bank accounts or submitting identity proofs and begin accepting crypto payments.
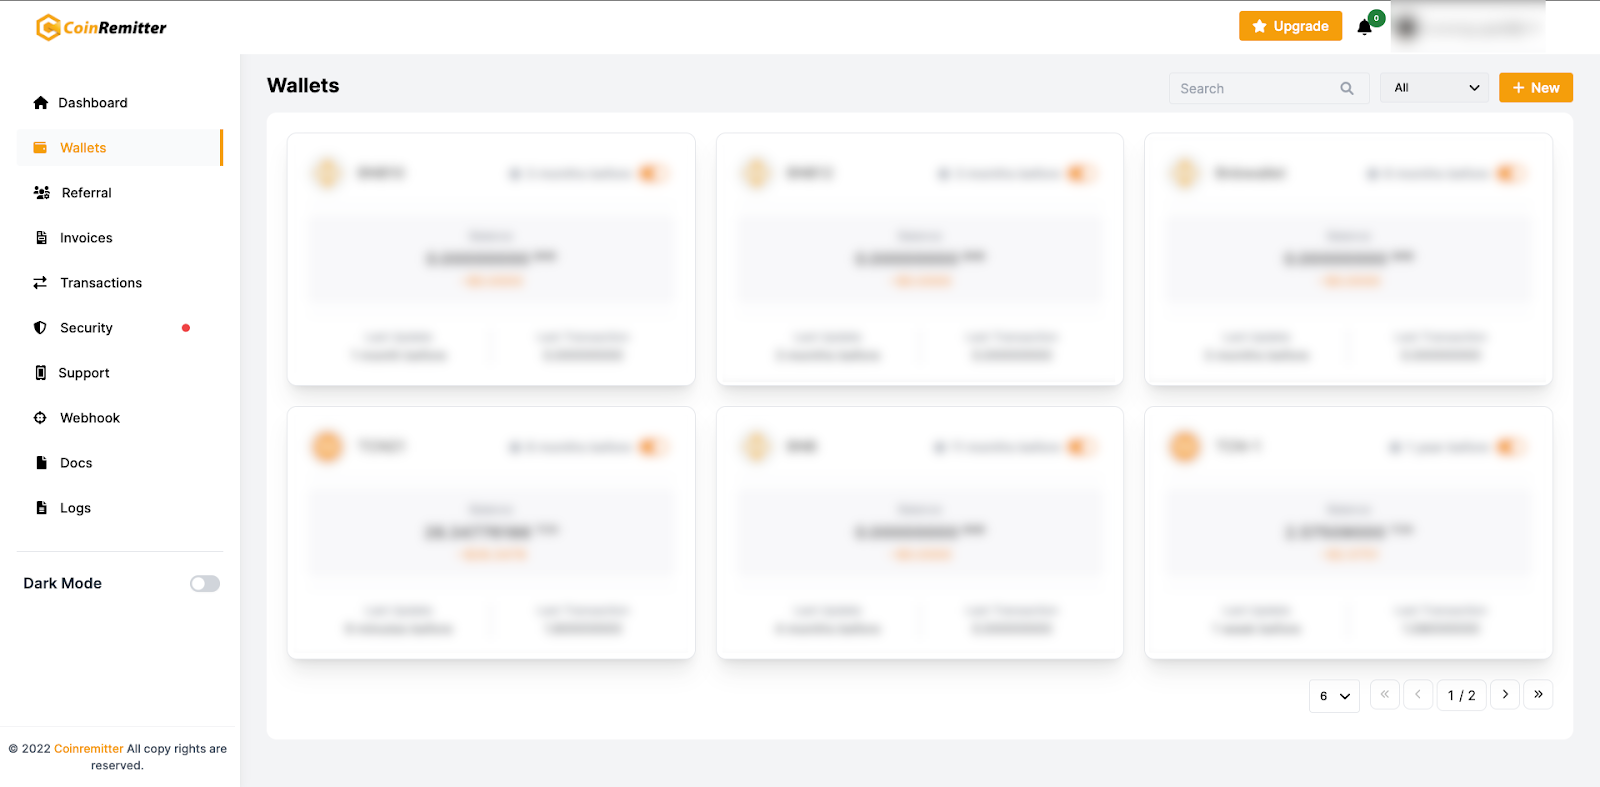
2. Add a compatible crypto wallet
Go to the dashboard and then go to wallets. Click ‘new’ to add a new wallet as shown in the image below:
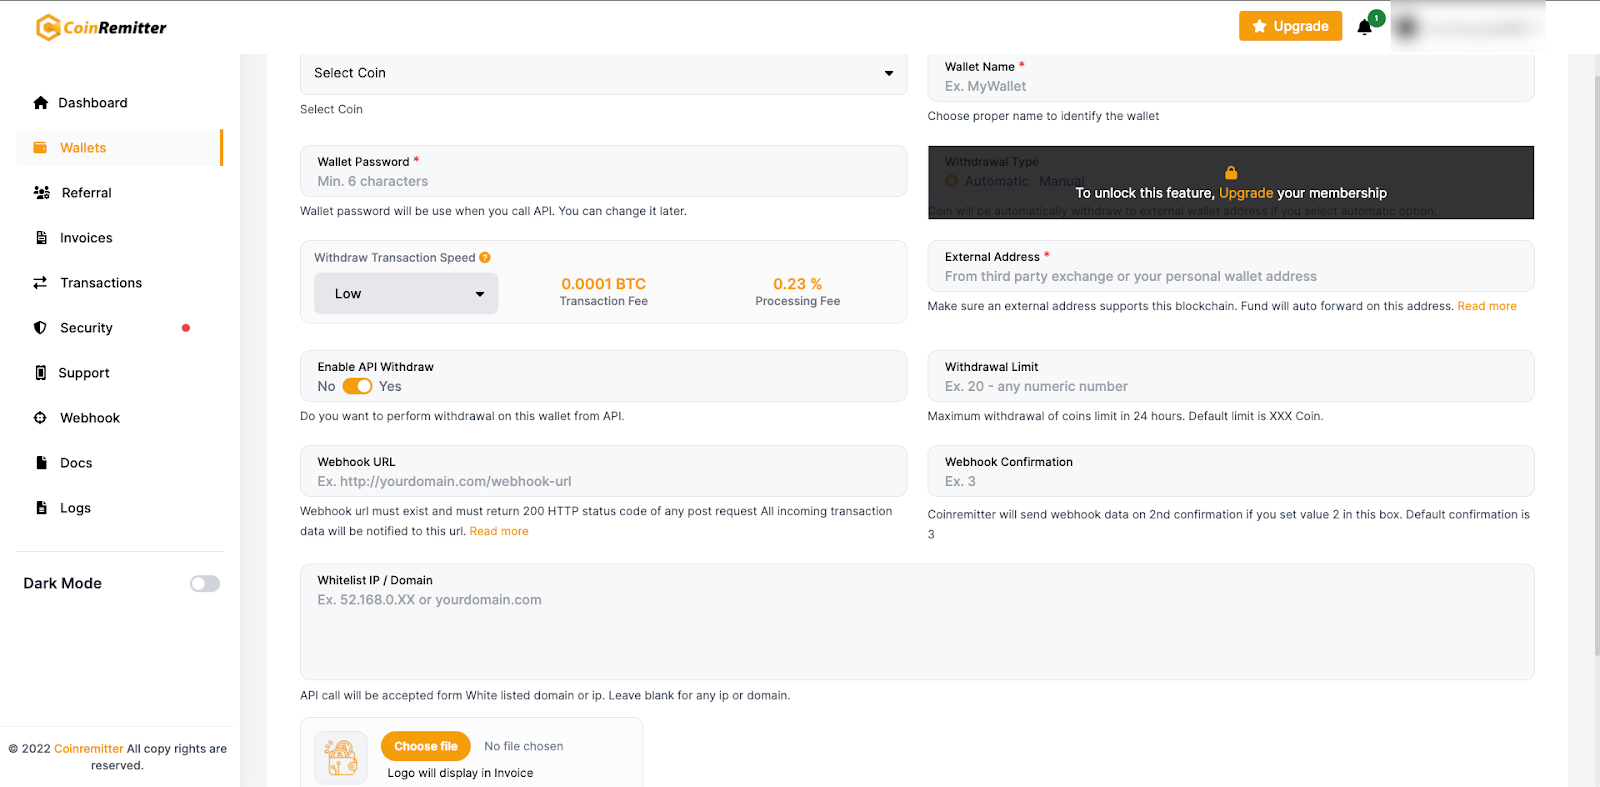
Then you’ll be asked to add some details as follows:
- Select coin: Choose a cryptocurrency, which you’re willing to accept in this payment.
- Wallet password: Set a password, which will be used during API calls.
- Withdrawal speed: Merchants can opt for faster withdrawals by increasing the processing fees.
- Enable API withdrawals: Merchants can withdraw funds through API by enabling this option.
- Webhook URL: Merchants can get notified via webhooks on the web address that is added here.
- Wallet name: Choose and enter a name of your choice here.
- Withdrawal type: You can choose between automatic and manual withdrawals here. However, manual withdrawals can be unlocked by purchasing the premium plan.
- External address: This box requires your valid external wallet address in order to withdraw your funds from the Coinremitter wallet.
- Withdrawal limit: The minimum withdrawal limit can be set by entering an amount here.
- Whitelist IP/domain: API calls will only be accepted from the domain name entered here. This prevents unauthorized usage of your API key and password.
- Logo/file: You can add an image here in a limited size and a specific format, which will be displayed on your invoice.
3. Add the crypto payment option to your website
You can do this using one of the following methods:
- Installing necessary plugins
- Integrating required APIs
- Installing necessary plugins
On Coinremitter, there are a healthy number of crypto plugins for some of the most popular open-source plugins. If your website is based on any of these platforms, you can choose a compatible plugin for your website. Those platforms are as follows:
Firstly, the availability may vary based on crypto payment plugins. They can be installed whether from the respective marketplace or from GitHub. After installing the crypto payment plugin, merchants need to activate it. Merchants can select a cryptocurrency, which they’re willing to accept as payment and the further step consists of linking a compatible crypto wallet. This can be done by getting the API key and the password of the wallet that is going to be used to accept crypto payments.
Notes:
- Some mandatory fields need to be filled in carefully (e.g. exchange rate multiplier and minimum invoice value).
- Multiple crypto wallets can be added here, but the maximum limit is five per setup.
- Integrating necessary API(s)
You can rely on this option if Coinremitter’s crypto payment plugins don’t work for your website. Integrating compatible crypto payment APIs into websites is necessary for optimizing the flow of accepting crypto payments. There are various crypto payment APIs that need to be integrated, and some of them are mandatory.
- Create a New Wallet Address (mandatory): By integrating this, a wallet address will be generated by the system whenever required. Integrating this is mandatory as having a compatible crypto wallet is required for accepting crypto payments.
- Validate Address: Merchants will be able to check the validity and compatibility of the wallet address added by the customer to make the payment with the help of this API.
- Withdraw (mandatory): Integrating this mandatory API will let you transfer funds to an external crypto wallet from Coinremitter’s internal crypto wallet.
- Get transaction: The system will send transaction details to merchants based on the entered transaction ID with the help of this API
- Get Transaction by Address: Merchants can get the transaction history by wallet address by integrating this API.
- Get Wallet Balance: This API will let merchants get their wallet balance.
- Create an Invoice (mandatory): Your website will automatically generate an invoice whenever a customer requests to pay crypto using this API.
- Get the Invoice: Merchants can view the invoice details (such as value and payment status) using this API.
- Deposit/Withdraw Response: Merchants will be notified of transactions via webhook with the help of this API.
- Notify Invoice Response: Merchants will be notified on the ‘notify URL’ during every invoice generation with the help of this API.
- Get Fiat-to-Crypto Rate: This API will let merchants display fiat-to-crypto exchange rates on their websites.
- Get Coin USD Price: This API will let merchants display crypto-to-fiat exchange rates on their websites.
Note: Coinremitter offers dedicated crypto payment APIs for each cryptocurrency. Merchants need to integrate a compatible API of a particular cryptocurrency.
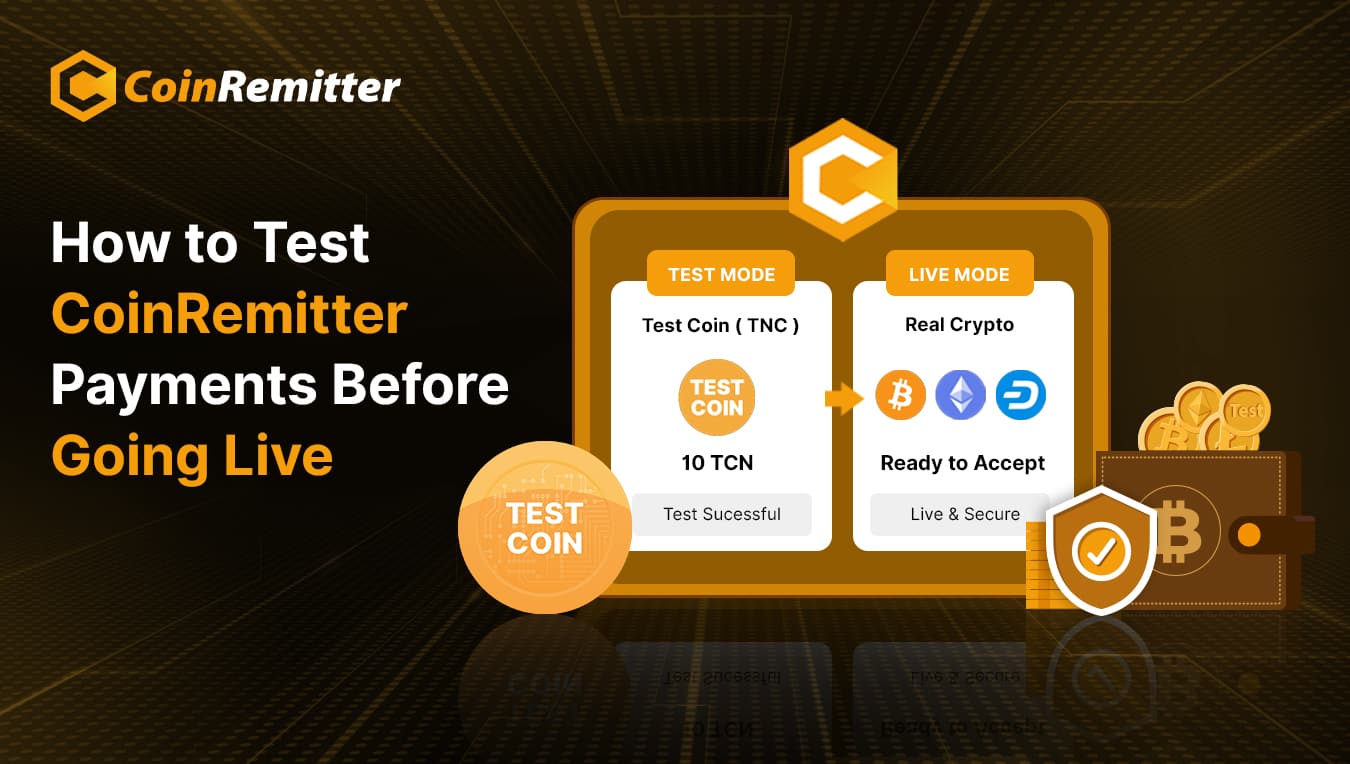
4. Test your integration
Merchants can test the integration before they start accepting crypto payments using Coinremitter’s test coin services. This can be done in the development mode. Merchants can add a test coin wallet and follow the required integration process (whether plugin or API) to begin. The rest can be done the same as above. Using the test coin will give an idea of how things will work in the production mode. You can learn more about the test coin and its usage here: What is the test coin (TCN) and how to use it during integration?
Note: When merchants get stuck on Coinremitter they can contact Support for a reliable solution. There are three ways to claim support from Coinremitter:
- Via chat: Merchants can click the chat icon at the right bottom corner of the screen. They can simply send problems they’re facing regarding crypto payments on Coinremitter.
- Via support ticket: Merchants can scroll down and click ‘support’ and then fill in the necessary details to generate a support ticket along with the message of the support they’re looking for.
- Via Email: Merchants can email the issues they’re facing with crypto payments on Coinremitter and we’ll try to respond to you with the best possible solution.
Recent News


Over 38,000 merchants are using CoinRemitter
Join them now