Coinremitter’s Pricing Widget Integration Steps: A Brief Guide to Accept Crypto Payments for Pricing Plans
Coinremitter allows businesses to create widgets for their pricing plans. These widgets aren’t just bound to display pricing information. Customers can click them to pay in crypto for their preferred plans. This means, as a business owner, you can create a widget using Coinremitter’s widget creation tool and use it to accept crypto payments on your website. In this article, we will go through a brief guide containing widget integration steps.
Click here to learn about Coinremitter’s ‘Pricing Widget’ in detail.
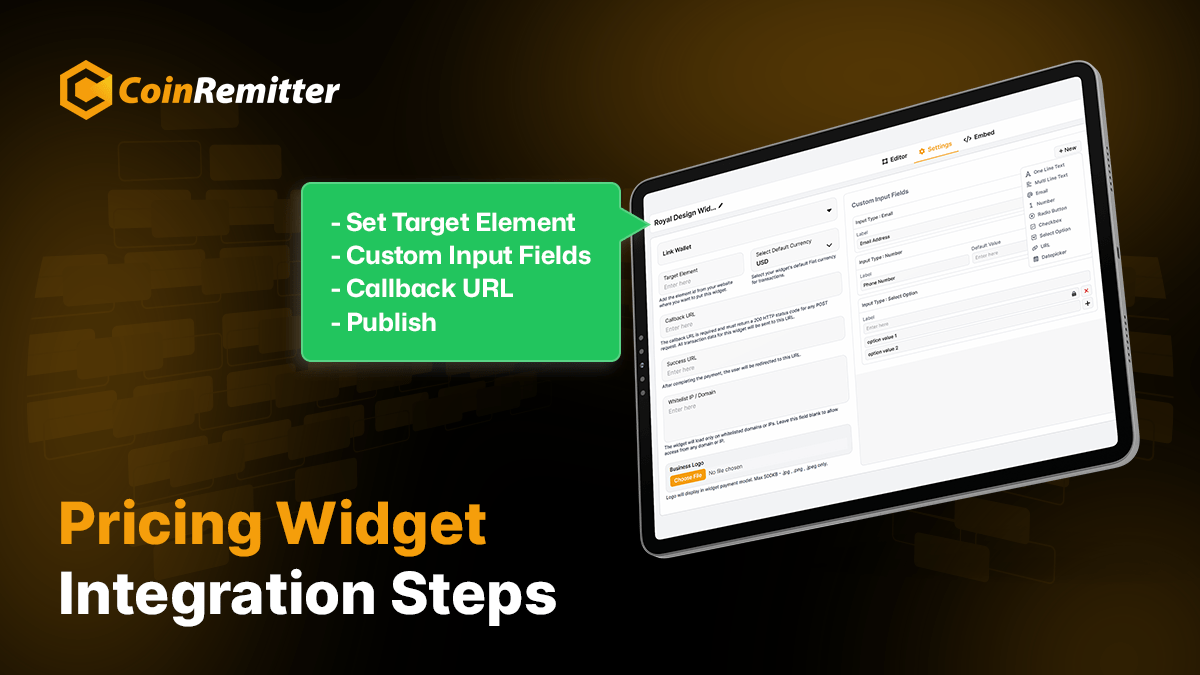
Mandatory Integration Steps
- After setting up the widget and clicking ‘Publish’, you will get a ready-made JavaScript code according to the preferences made by you.
- After getting the widget code, copy and paste it to the website’s source code, where you are willing to display the widget.
Optional Steps
- You can define the target element in the widget settings. After doing this, the pricing widget will display the element with id=”target_element”.
- Alternatively, you can define the target element dynamically while loading the pricing plans. However, you must add the following code to your widget script:
| crWidget.setAttribute(‘target’, ‘cr-widget’); |
- If you don’t specify the target element, the widget will be displayed wherever the code is placed.
- If you want to set the email or phone number fields dynamically, you can include the code shown below in your callback function:
| crWidget.setAttribute(‘data-email_address’, ‘[email protected]’);crWidget.setAttribute(‘data-phone_number’, ‘3305558831’);crWidget.setAttribute(‘data-country_dial_code’, ‘+1’); |
- After adding this code, you can allow users to modify the fields mentioned above.
Custom Input Fields (Optional)
- You can create a custom input field, which will be included in the widget’s JavaScript code by the name of the data-* attribute.
- Examples of prefilling custom fields:
- For a custom field created by the label Website Url:
| crWidget.setAttribute(‘data-website_url’, ‘http://yourdomain.com’); |
- For a custom field created by label interests containing multiple checkboxes:
| crWidget.setAttribute(‘data-interests’, JSON.stringify([‘Integration’,’Development’,’Reasearch’])); |
- The custom field data will be sent to the URL entered into the ‘Callback URL’ in widget settings.
[Note: Code lines mentioned above can be added at the end of the widget script (before or above </script>)]
Recent News


Over 38,000 merchants are using CoinRemitter
Join them now